
So I decided to whip up a simple tote and deck it out with these gorgeous handles and some matching hardware I had on hand.
The result?


Gorgeous, no?
And I'm not kidding when I say I "whipped" this up. This is a simple, basic tote with some fancy hardware. A beginner can make this....EASY PEASY!
Interested in learning how? I'm happy to share...just keep reading (after the jump).
Please read through this entire tutorial BEFORE you start!
WHAT YOU NEED:
- Your favorite tote pattern or tutorial. This will work best on totes that are at least 15" wide. Don't have one? You can use my tutorial for a "Simple Tote".
- Canvas or Home Decor Weight fabric (enough as your tote pattern/tutorial calls for)
- Medium Weight Interfacing (enough for the exterior and lining fabric)
- 1/4 Yard of Heavy Weight Interfacing (Timetex or Peltex work well...it should be stiff)
- Bag Hardware
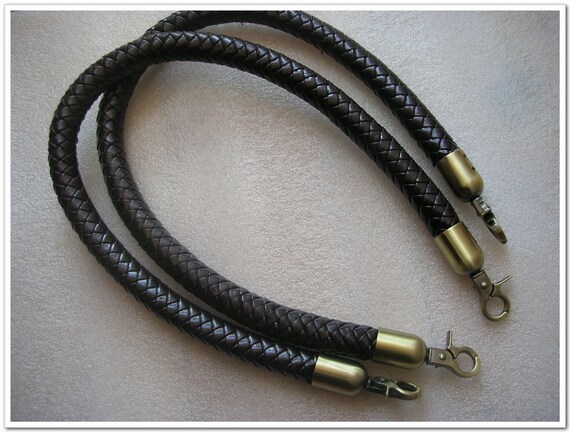
- Handles
- Gate Rings
- Grommets
The type/style of hardware it what really makes this bag. Have fun with it! Choose something that fits your personality and make it stand out by splurging on some nice quality bag hardware. I found my handles, gate rings and grommets through THIS Etsy Seller, who sells quality goods at a decent price. Please note that this seller is located in Hong Kong, so please allow adequate shipping time.
I used these brushed brass grommets and gate rings. I just love the look!


STEP 1 (Make the Tote)
Follow your tote pattern/tutorial directions for cutting out your main pieces of fabric and lining. Cut duplicate sizes of medium weight interfacing and iron them to the coordinating pieces.
* Disregard any instructions for cutting handles....you'll add your store-bought ones after you finish sewing the tote body.
Cut 2 pieces of the heavy weight interfacing 2.5" wide by X" long.
If your tote top measures less than 16", X=10"
If your tote top measures MORE than 16", X=12"
Your Peltex will measure approximately 6-8" shorter than your tote width. Got It?
Take a look at this diagram:
 |
| Note that if your tote width is less than 16", X would be 10" and the distance from the edge of the Peltex to the sides will be different. This Peltex is serving as a reinforcement for the handles, so you want it to be wide/long enough to cover the areas where you will be placing the grommets. It also adds a nice stiff edge to the tote opening. |
Sew the Peltex to the top/center BACK of each Main tote fabric panel with a basting stitch. This is done on BOTH pieces!

Now you can assemble your tote as your pattern instructs you to.

If you wish, you may want to take some extra Peltex and reinforce the bottom of the tote too....this is up to you! If you do decide to do this, make sure you do it BEFORE you sew up the sides! You can also make a reinforcement insert later which can be removed if you don't want to take the time to do this now.

Congratulations, you have a tote without handles!

STEP 2 (Install the Grommets)
Decide and mark where you want to install your grommets. For this tote I found the center of the opening and marked the holes 8" apart (or 4" to the right and left of the center point) about 1 1/4" down from the top.

Create a hole at that mark. You can use a seam-ripper, eyelet tool, or a leather/fabric punch. This hole will go through the outer layer of fabric, the Peltex and the lining of the bag.
Using your grommet as a guide, mark the inner circle diameter that you will need to cut.


Now, with a sharp pair of scissors, slowly and carefully cut out this circle. Only cut to the mark.

Once done, try to fit your grommet - it probably will not fit, so you will need to cut more, but do only a tiny, tiny bit at a time because if you cut the hole to large, you are out of luck and will need to remake the tote!
Once you can slide the grommet through the hole, take a minute and reinforce the hole by stitching a zig zag stitch around the opening - this will prevent the hole from getting bigger or fraying. Then place both sides of the grommets back into the hole and close it (with grommet tool or screws.)


Install the other four grommets. Once again, I cannot tell you how important it is to take your time when doing this! For me, it took longer to install the grommets than to sew the tote!
STEP 3 (Finish)
Once the grommets are in place, simply add your Gate Rings and your Handles!


Now go show off your bag!

Enjoy!

where can I buy 'gate riings' never heard of them
ReplyDeleteHi Kate, You can get them at places that sell handbag hardware. I personally like to get mine from the Etsy Seller here: https://www.etsy.com/shop/bagpurseframes Please note that they ship out of Hong Kong, so it does take some time to get to you!
DeleteThis totally helped me with my eyelets! Thank you!
ReplyDelete