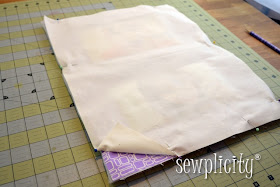
I was recently asked by the folks over at Things Crafty to review some printer fabric for the site. When the fabric came honestly, I had absolutely NO idea what I was going to do with it. It sat on my desk for a few days and yesterday the image of this just came to mind. I dropped everything and got to work.
This came out so nice, I knew I wanted to create a tutorial for it.....
This tutorial shows how to create the hanging pictured. If you wish to alter the dimensions, I highly recommend using paper to layout your design first. This will help you guage how much fabric you will need and how to cut the pieces.
WHAT YOU NEED:
> 1 sheet Sew-In Printer Fabric (I used Tailor Computer Fabric for this)
> 1 Fat Quarter (Main Fabric)
> Muslin (or scrap fabric for backing)
> 16 x 12" Batting (I used 2 layers of thin polyester batting, but cotton or blend would work well too)
> Fusible Interfacing
> 1 12" Wall Hanger (this one is by Classic Motifs)
> 2 digital pictures (with print quality resolution) size 8" wide x 5" high
 |
| Notice my paper template? This helped me get it right the first time! |
STEP 1: Cut & Prep Fabric
> Cut the main fabric, interfacing and batting to measure 16"x12"
> Cut two tabs measuring 8" x 4.5"
> Apply fusible interfacing according to manufacturers directions
> Print out the two photos on the photo paper (following manufacturers directions)
 |
| I highly recommend running a test print on regular paper first! |
 I choose to apply fusible interfacing on the back of my photo fabric. This was a bit tricky because the photo fabric I used is not water-safe, and fusible interfacing requires steam! My solution was to place the photo fabric face down on my board, then put the interfacing on top, and cover with a press cloth. I pressed it quickly using a very low steam setting then switching to a dry iron for added heat. It worked fine!
STEP 2: Make the Tabs
Fold the tab in half (shorter ends on sides) and unfold
Fold the edges in to meet at the center crease
Sew around the perimeter 1/4" from the edge
Put the tabs aside for now
STEP 3: Attach PhotosYou will be using a reverse applique to attach the photos....
Place your main fabric face down and position your photos. I drew cross hairs on the main fabric so I could position these evenly. There will be 2" from the top and bottom and between the two pictures.
Pin the photos in place and sew them to the main fabric using a 1/4" seam allowance
(Make sure you are using a coordinating bobbin thread - it will be visible)
Carefully remove cut away the main fabric inside your stitch lines to reveal your photos. I chose to leave about an 1/8" of fabric from the stitches. You can use a seam ripper to start, just be very careful to not cut the photo fabric!
STEP 4: Add Embroidery (OPTIONAL)
If you will be adding embroidery, now is the time to do so. I used my hoop guides to center the word "Sisters" in between the two pictures.
STEP 5: Attach Tabs
Fold the tabs in half (raw edges together), pin and baste 2" from each top corner
STEP 5: AssembleLayer the batting, wall quilt (face up) on top of the batting
Then top with the backing fabric (face down)
Sew around the perimeter using a 1/2" seam allowance leaving a 4" opening at the bottom to turn
Cut the corners
Turn right side out and press with a dry iron
STEP 6: Finish
If you have a walking foot, I recommend using it here. Top stitch around the perimeter 1/2" from the edge. Following the stitch lines around the pictures, stitch again to quilt all the layers together. This will make the photos really "pop"!
Attach to your craft hanger and hang!
You can get real creative with this idea...think about collages, pillows, framed art....so much fun! Enjoy!


So cute. Thanks for the tutorial. Do you think a zigzag stitch will look okay around the photo area since it will be a raw edge?
ReplyDeleteJust love this idea. I would love to make one for my sister of her two daughters.
So cute! What a great idea.
ReplyDeleteThis is adorable, I must say. I have two girls myself and I know that this would make a wonderful gift for a grandparent! :)
ReplyDelete