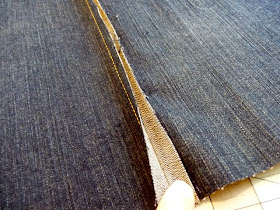
In this post I'm going to show you how easy it is to do this. But first, let me tell you why you would want to.....
Flat felled seams are typically used for their strength. They are used for seams that are put under a lot of stress (jeans/shirts/tents), or they are used for decorative purposes (bags).
The flat felled seam can come in very handy when working with any heavy weight canvas or home decor fabric.
Here some hints that will help you get optimal results:
- If working with denim or heavy fabric, use a thicker thread so the seams show nicely. You can purchase denim thread, or upholstery thread works well also.
- You will need a denim needle if working with denim/canvas/heavy thread
- Adjust your tension to accommodate the heavier thread.
- Use a long stitch, it looks much nicer than a short one. I set my machine to stitch at 4.5 in these pictures.
STEP 1: Lay your two pieces of fabric WRONG sides together and sew using a 5/8" seam.
STEP 2: Press that seam to one side and use your finger to open the seam up
STEP 3: Trim the back seam allowance in half
STEP 4: Now, maneuver the wider seam so it folds over the cut seam allowance and encloses it by folding over and under it.
STEP 5: Press the seam flat and topstitch it keeping the needle as close to the folded edge as possible. Take your time here - you want the seam to be straight, especially if using thread that is going to show!
That's it!
Get creative!


Great tutorial! I will be adding this link to my Crafts tab.
ReplyDeleteHave a great Thursday,
Kelly
Coupons, Crafts and Causes
Coupons, Crafts and Causes - Facebook